Why and how to setup HTTPS (free for forever)
Writing this article, took way more time than migrating my website from HTTP to HTTPS. So, why HTTPS? Is it something cool to do or is it really needed?
- SEO: Google favors HTTPS as it guarantees secure access for it’s users. If some of your pages have same page ranking as your competition’s, you have an advantage if you have HTTPS-enabled.
- Data encryption: It’s easy to put packet sniffers in a network and see what data is being sent/received by an app (web/android/iOS) if your communication is not secure. HTTPS makes sure that all the data, even a simple API call is secured and the sniffers will get to see random bits of non-sense data.
- Trust: People (generally tech people) trust websites with HTTPS for e-transactions. You’ll see almost all of the e-commerce websites are HTTPS-enabled.
- Messenger Chat-bot: If you want to create a chat bot on Facebook messenger, well, you have to have an HTTPS-enabled website. Not sure about other chat bot platforms though.
So you need HTTPS. Not yet convinced? Let Google convince you then. Now lets proceed to HTTPS migration for free, thanks to StartSSL.
Registering on StartSSL:
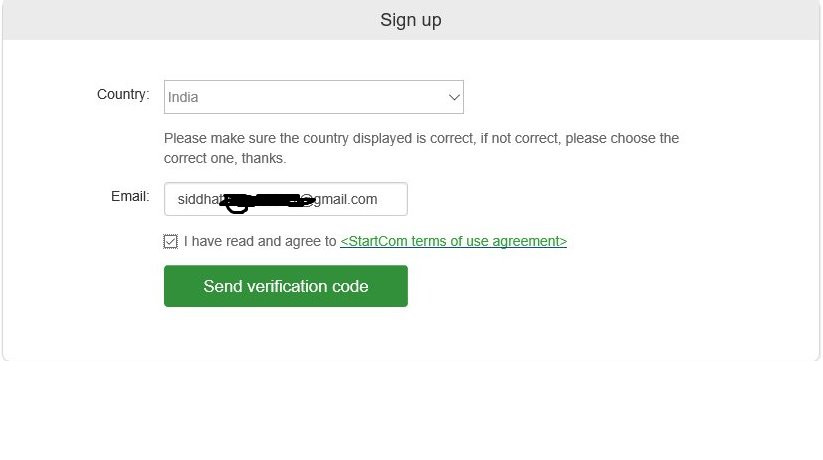
- Go to StartSSL’s signup page. Enter your country and email address and click on Send verification Code.
- You’ll receive verification code in your inbox, copy and paste in the verification box and hit login.
Validating your domain ownership:
- Now you’ll be taken to control panel. Click on validation wizard and select domain validation.
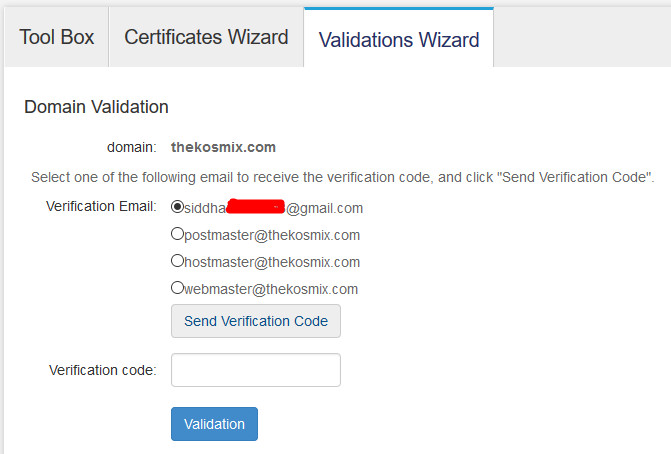
- Enter your top domain name (strollup.in) without www or http. It will show you your email id (registered email id). Select it and click send verification code. You’ll receive validation code in you mail box, select and enter it and click on Validation.
Generating free SSL certificate:
- Once you have validated your domain, you can now order your free SSL certificate by pressing on “To order Certificate”. It will take you to certificate wizard, where you can enter up to 10 sub-domains of your verified domain.
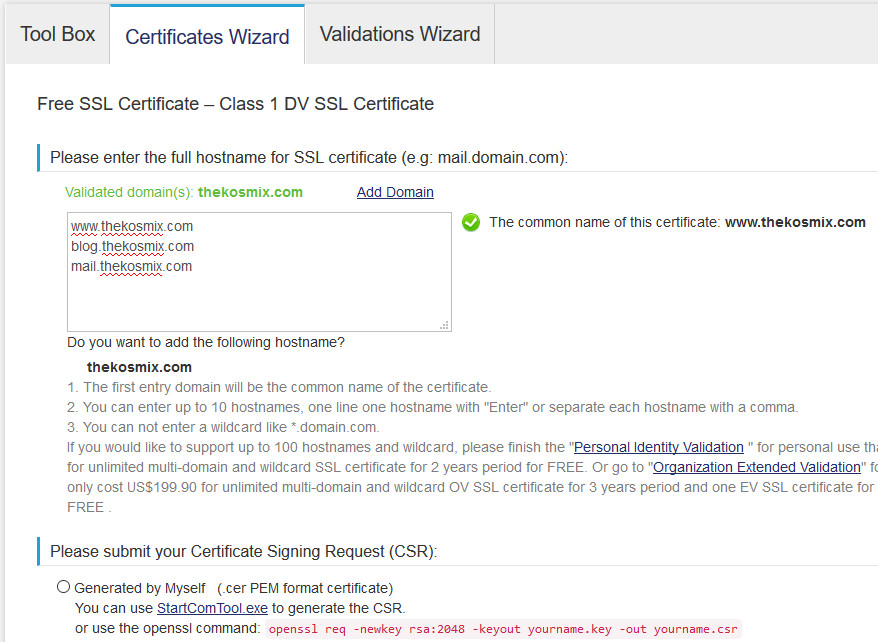
- Now Generate your CSR (Certificate Signing Request) file with the command given on the above page. It will generate 2 files: yourname.key and yourname.csr. Copy the CSR file’s content and paste in the given text field and click submit. We’ll need key file later.
Downloading and Uploading your SSL certificate to Server:
- Click on the Download certificate and you’ll get a zipped file. Unzip it and you’ll see 4 more zip files: Apache, IIS, Nginx, OtherServer

- Extract the zip, whichever server you’re using. You’ll see 2 files: 1_root_bundle.crt, 2_domain_name.crt. These are your certificate files which have to be uploaded on your server (using sftp/scp) along with the key file generated in 3rd step.
Configuring your apache config:
- After you have uploaded the certificate files, set their permissions as 644 (-rw-rw-r–). Now let’s edit your apache config file (generally at /etc/apache2/sites-available/your_site.conf) to enable https.
- Copy the code block between <Virtualhost:80> and </Virtualhost> and paste below it. and change the port 80 to 443. Now your apache conf file will look something like: <Virtualhost:80>. . . . . </Virtualhost> <Virtualhost:443>. . . . . </Virtualhost>.
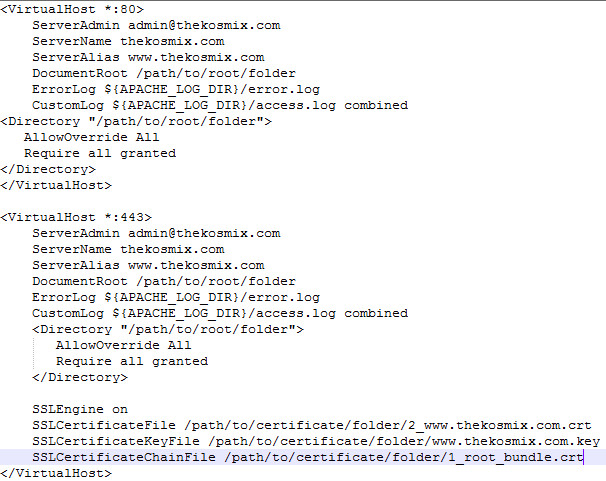
- Add the following line before closing of virtualhost (</virtualhost>)

- Enable mod_ssl, if not already enabled, restart your apache server and visit your website with HTTPS.
This configuration can be used with AWS’s elastic-beanstalk as well.